- Introduction — what you will have set up by the end of this chapter
- IDE agents vs CLI agents — the two flavours, narrow scope to CLI for this chapter
- Understanding the workspace — mental model of what the agent can see, do, and access before you install anything
- Installing an agent — now the reader knows what they are installing and why
- Running your first prompt — first real interaction, what to expect
- What is agents.md / CLAUDE.md? — general repo configuration for agents
- Prompt engineering fundamentals — how to communicate effectively with the agent
- Custom agents — specialised agents for specific tasks, encoding tribal knowledge
- Skills — automated slash commands, how they differ from custom agents
- Putting it all together — final repo structure walkthrough
Introduction
IDE agents vs CLI agents
Traditionally, software engineers use code editors to navigate and edit their code. These are often referred to as IDEs (Integrated Development Environments), and you could say the IDE is the main tool every software engineer uses to write code. Some common examples are VSCode, IntelliJ, or Eclipse.
On the other hand there is the terminal. The terminal is an environment where we can interact with our machine programmatically using commands. It is an alternative way to access our machine and its filesystem rather than using the desktop interface with our mouse. It also gives us more flexibility as developers, as there are things we simply cannot do from the UI directly.
To make interaction with the terminal easier, a lot of the tools we use provide a command line interface (CLI). A CLI is a structured way to run software from the terminal. The way it works is that you type the tool name followed by options to run what you need.
When it comes to working with agents there are plenty of options to choose from. Some of the most popular options include Claude Code, Codex, GitHub Copilot, Cursor, or Windsurf. All of these options can be sub-divided into two main categories: IDE based agents and command line (CLI) agents.
IDE based agents are agents that are embedded within your code editor. With IDE agents you usually have the code files open on one side of your screen, while having an agent chat window open on the other side of the screen. The idea is that you can see live code changes in your editor and manually review changes as they happen. Some popular examples of this are Cursor, Github Copilot or Windsurf.
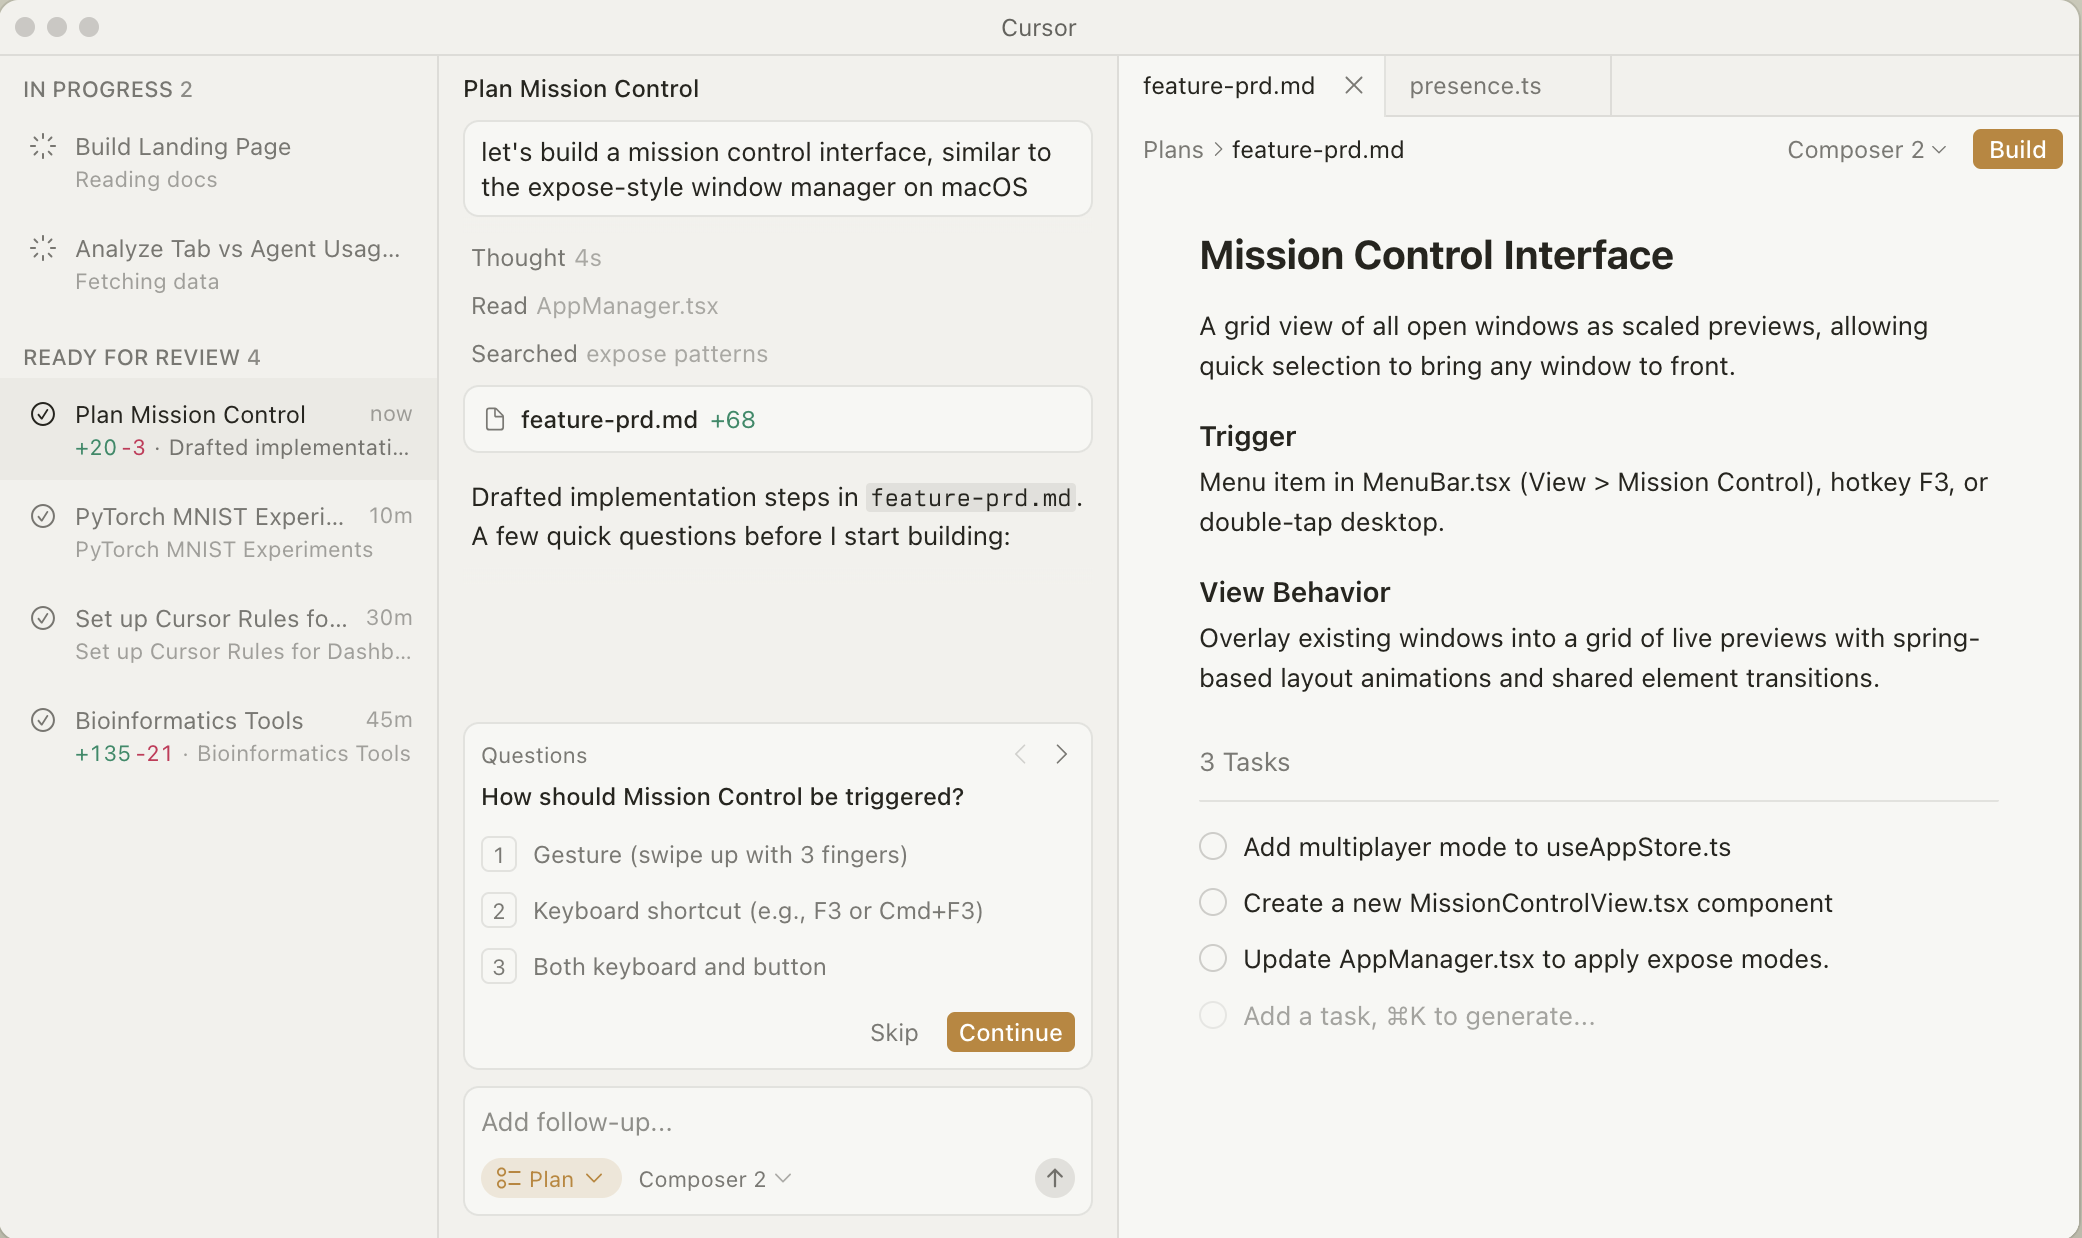
IDE agent example using Cursor
On the other hand CLI agents, are those that you run directly in your terminal. CLI agents are not attached to a code editor, you can simply ask the agent to complete a task from the terminal without having to see the code if you don’t want to. CLI agents provide a bit more flexibility than IDE agents, because you can use them without any IDE, or you can still use them in your IDE by running the agent in your IDE terminal. Many CLI agents also have IDE extensions which means you can still use them within your IDE if you whish to do so. Some popular examples are Claude Code, Codex, Github Copilot CLI, or qwen code.
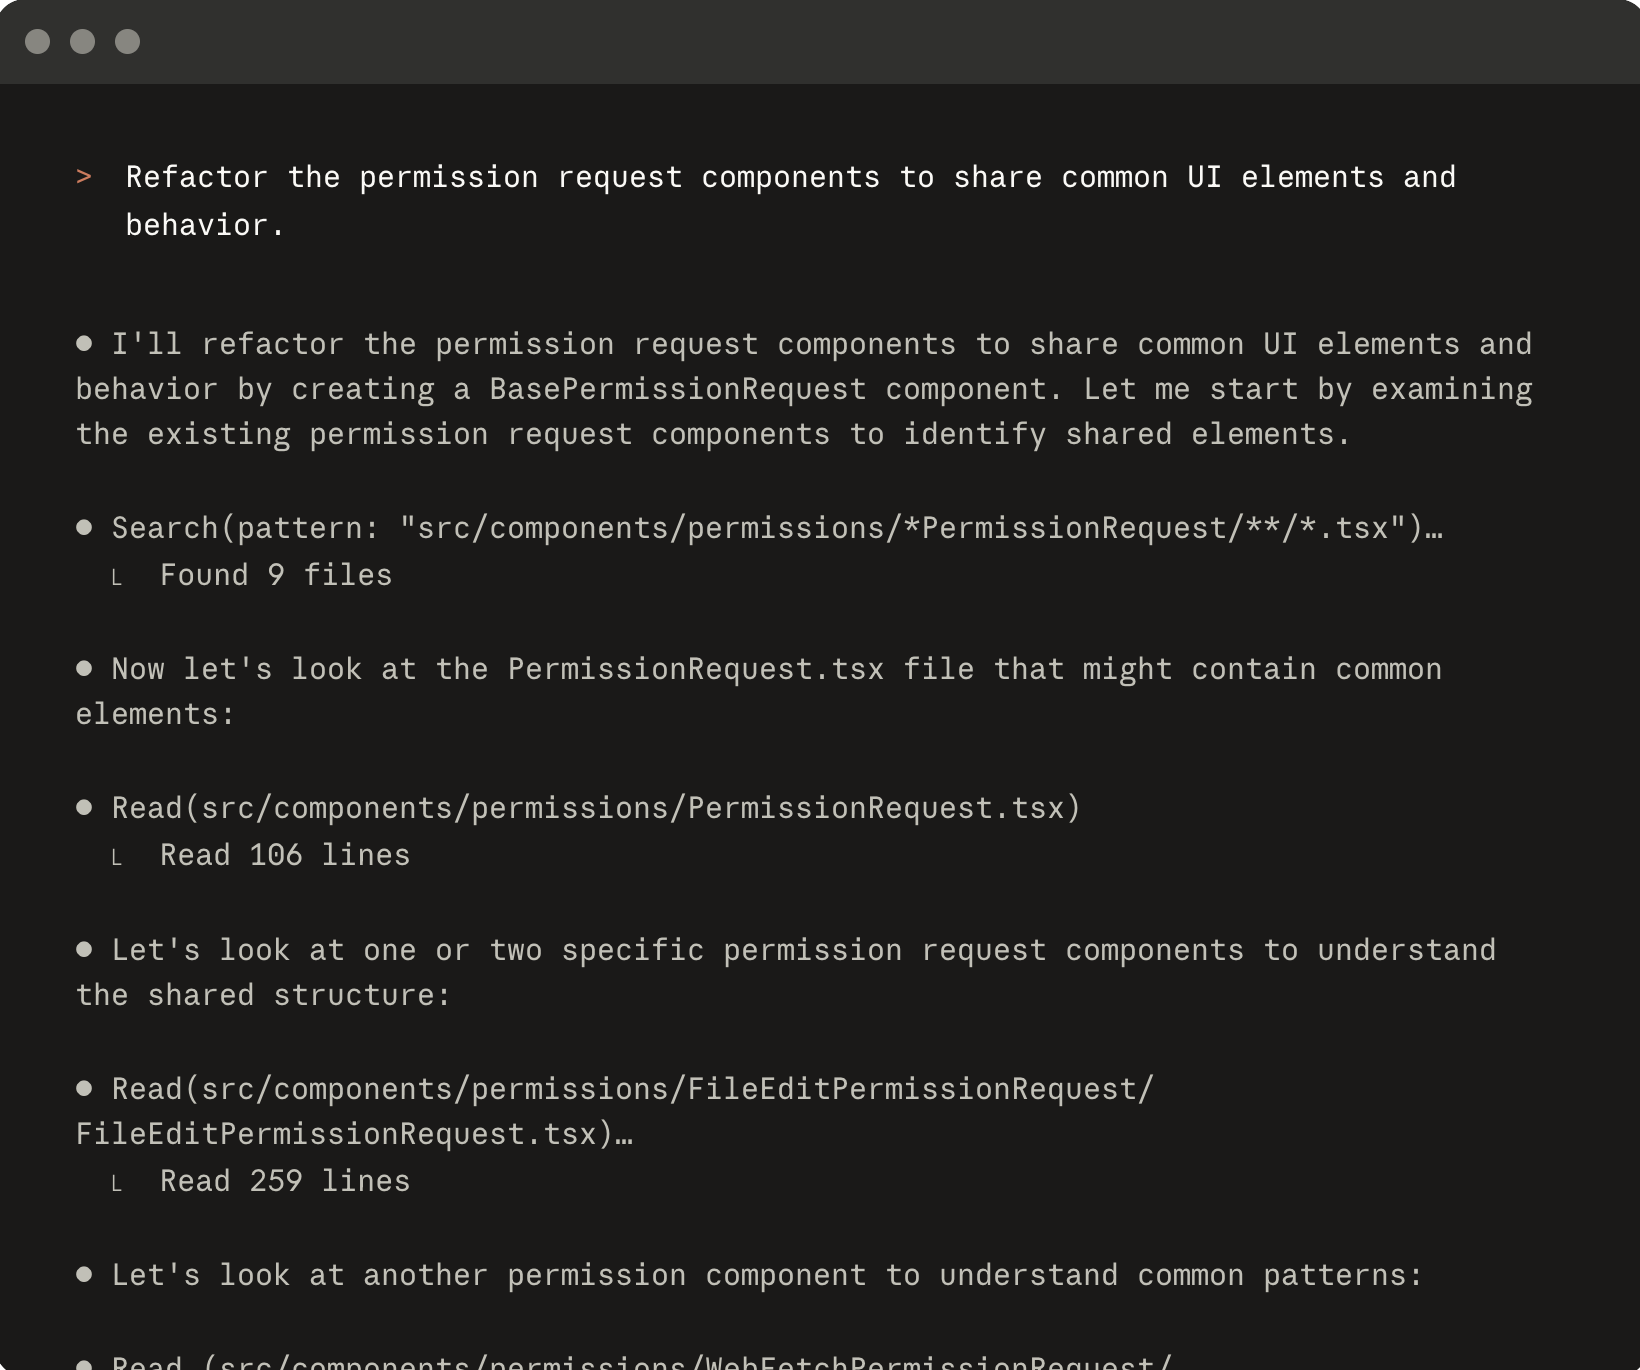
CLI agent example using Claude Code
Whichever you decide to use, all agents have more or less the same capabilities to access the relevant tools to complete tasks autonously. The main difference is the philosophy behind using one or the other. With IDE agents, the philosophy is that there should be a human in the loop during the whole process. With CLI agents, the philosophy is more about letting the agents handle the code writing and execution with less human in the loop, while still leaving flexibility to the developer to decide how involve they want to be.
It is worth noting that most agent providers give you the option to use their agent within the CLI or within the IDE. So it’s up to you to find out what works best.
Understanding the workspace
Agents work within your machine, and can execute anything that you can execute. Think of an agent as a tech expert who lives inside of machine. Any tools you have access to in your machine, the agent also has access to. This means that using the right instructions and setup you can delegate any task to an agent.
Coding agents are built so that they have access to tools. These tools are the basic tools it contains to be able to complete any coding tasks.
The first tool is listing and searching files. This is necessary in order for the agent to understand repository structure and being able to find relevant files. The next logical tool is file viewing. Once you have found the relevant files, the agent is able to read files, which is required to be able to understand the existing content, to see what changes might be required based on the user prompt.
Another important tool is the file search and text search tools. When an agent needs to search for a specicific file or specific keywords, it uses a search tool to find the relevant files.
The next tool agents have access to is file editing. Once the agent has reviewed the existing files and needs to make a change based on the user prompt, it then uses the file editing tool to make the edits. If the files don’t exist, it creates its own.
With list, search and edit tools the agent can complete mosts tasks. However, there may be a lot other things that cannot be accomplished with them alone. Which is why we give access to the agent to run terminal commands. If the agent wants to run a spefic command, for example from a tool you have installed, it can use this tool to run commands in the terminal. With this, the agent has pretty much all the tools it needs to complete any task.
Running Commands
Giving the agent access to run its own commands is one of the biggest breakthroughs into enabling agents to cemplete tasks autonously. However, this also comes with its own risks. What if the agent decided to run the rm ~/ command in your machine and deleted everything in the home directory? This is not only hypothetical, but we have already seen real life examples of issues like this happening.
To prevent this, coding agents have a system to ask for permissions before running any commands. What this means is that when the agent identifies the need to run a certain command in order to achieve its goal, it pauses and asks the users for permissions before moving on. What this looks in practice is a prompt in the chat window where you have confirm if you want the agent to run the command and continue. If you reject, the agent drops the task and you’d have to start again.
Having to manually approve commands, while required to keep your system safe, is a very tedious task and it goes against the philosophy of letting agents autonously write the code. Having a human in the loop constantly approving commands can be innefficent and counter productive, assiuming that most of the times the commands will be safe.
An alternative to command approvals consists in running agents in a sandbox environment, where their access is scoped only to the minimum and necessary, blocking access to anything else outside of that. For example, when working in a repository we can give the coding agent full access to the current directroy, and block any read & write access to anything outside it. This means, that if we let the agent run commands freely, if anything happens, the damage contained within the repository and nothing else. This can give us the confidence to run agents autonously to complete tasks without our supervisien. We will talk more about sandbox environments in chapter 5.
WHat the agent can’t see
By default, agents cannot access anything that cannot be accessed from within your terminal. For example, your browser tabs, slack messages or any other applications outside your terminal. However, there is flexibility to give agent access to these if that is something you want to do, and you can do it via command line tools and MCP servers. With these you can extend your agents to have access outside of your terminal, such as making interneat searches, reading and writing messages on slack, accessing your confluence sites and so on. We’ll speak in more detail about them in chapter 4.
To summarise, the agent has all the tools it needs to read, write and execute code in your machine. Agents have access to run commands on our behalf, so we need to be careful about the permissions we give the agents to prevent from running any dangerous commands. Finally, if we want to give the agent access outside of the terminal, we can use specialised CLI tools and MCP servers to extend the context of our agents.
Installing an agent
Installing an agent is really straightforward. Once you have chosen the type of type of agent you want to run, head to their documentation website and read the installation instructions.
Keep in mind that using agents is not free. Coding agents work within your machine, but they still need to make network requests the the AI models which are usually hosted by an LLM provider. However, some coding agent providers give free or limited access to some of their models, so you can still use them if you do not want to pay for an account.
Let’s assume you have instatlled a CLI agent, such as claude or codex. Once the installation is complete, all you need to do is open a terminal and type claude or codex depending on your installation. This will open chat interface within your terminal ready for you to start giving instructions.
Running your first prompt
what to expect, how the agent reads the repo
What is agents.md / CLAUDE.md?
The agents.md file should contain any general information which is useful for any agent interacting with that repo. It should include setup commands to execute dev environments, code style, testing principles and anything about how to operate in that repository. The agents.md file can be used to document generic information about the repositiry that any agentic workflow should include as context.
Prompt engineering fundamentals
[TODO]
Skills
Skills are a concept now used by most coding agents. In short, when you find yourself using the same prompt over and over, you create a skill to make it easily re-usable.
Let’s say for example that you use your agent for your development workflow. Every time you build a new feature, you want to test your code, so you have a prompt to tell your agent how to test: which frameworks you use, how you write tests, what to test, and so on. Over time, you create a prompt that has all the required context so that the model gets it right. However you find yourself having to refer to this prompt over and over again. As your workflow changes and improves over time, you end up having to save and maintain this prompt in a document somewhere, and this becomes unnatainable.
The solution is to use skills. A skill is a markdown file containing information about how to do something. For the testing example, the task has all of the information to instruct an agent how to build a test suite the way we want to. We can have as many skills as we want to, depending on our workflow and what’s useful to us.
The main benefit of using skills is of course re-usability. When you create a skill, you can simply invoke the prompt by using the skill name, such as /test, rather than having to type or paste the whole prompt. The other big benefit of having skills is that it also makes the prompts not only re-usable for yourself, but for the rest of the team members, so that everyone uses the same skills making sure that everyone builds features using the same standards. Having centralised and re-usable skills also makes it easier for the rest of the team to collaborate and improve the skills over time to improve the overall team’s engineering workflow.
When it comes to creating skills, there is no limit. We create as many or few skills as we need for our engineering workflows. The core principle of creating skills is to create small specialised skills, with a single responsibilty, rather than creating very generic skills that try to cover too many things.
Let’s take an example. We could create a skill called /implement which contains all of the information on how to implement the code, run it and test it all in one prompt. This would work, however we end up with a skill that’s trying to do too many things. This creates some problems. First, the markdown file ends up being too big. WHen developers want to review or change the file, it makes it very difficult to review and modify. Second, as the file gets larger, it means the agent has a lot of context in a single prompt, which means that some information might be missed. Third, if the model has already implemented some code, and we wanted to only test, calling this skill would mean the agent gets a lot of useless context that is not required for the testing task. THis means more unnecessary token usage and the risk of information being missed or ignored during implementation due to the large input prompt.
A better solution is to break down the skills into small independend units. For the example above we could have a /build, /write-unit-tests and /run-test-suite skills, each with its own lever of responsibility. WHen we split them into smaller units, we keep the markdown files small and easy to review and modify. It also means, that we can pick and choose each task when we need them. In some cases we will want to use all three, in others, we may just want to use a single one.
We deciding how much to break down skills, think of how you would build functions or methods when you write code. You would rather have small functions that have a single responsibility, so that they are easy to read, understand, test and modify. The same idea applies to skills.
It is worth noting that we can also go the other way, and break down skills too much. THis would create very small and readable files that are easy to understand and edit, but it may make our workflow too slow and more inefficient that needs to be. We need to find the right balannce.
[Example of an md file]
Agents
In the previous section we defined skills as re-usable prompts that can easily be invoked by their name. On the other hands, we have agents. Think of agents as “personas” than need to achieve a specific goal. An agent can then use different skills to achieve the goal.
Let’s say for example we have an agent for building features in our repository. For this repository, we have different skills: /build, which implements the code; /test, which runs the unit tests; /review, which reviews the final code and suggest changes; and /pr-request, which creates a pull request ready for review. All of these skills represent the workflow a team may use to build features.
As a developer, we could simply invoke each of the skills manually in our coding agent, one by one and achieve the task. An agentic approach would involve using an agent to run that workflow end to end, making use of all of the skills to build, test and push the PR.
When using agents, you define a goal such as “Implement feature X”. It then looks at all of the available skills, and uses the relevant ones when it needs to. By being able to choose, it can then use them in any order it needs to achieve the task. For example, after the /review phase, there may be some changes required, so the agent can go back to the /build & /test phases should it need to, before going back to the /review phase again. If everything looks good it can then push a PR. By using a mix of skills and agents we can create a fully end to end agentic workflow.
One of the biggest differences between skills and agents is that skills are simply re-usable prompts with no context attached, whereas agents are “personas” that need to achieve agoal, for which they keep a context of all of the actions and skills used during the session.
Like skills, agent files are also markdown files with a set of instructions. The agent file will contain information about it’s purpose, and instructions on how to best achieve it’s goal.
At this point, you may be wondering: why use skills? WHy not give the agent all of the context it needs to achieve its’ goals in its own mardown file?
The answeer is, yes that can be done, but it has its downsides. Like skills, we want to make sure we keep the markdown files small, targeted, easy to read and understand. If we have a simple agent, then we may encode all of the information it needs in its markdown file. However, for agents that need to achieve more complex tasks in more complex repositories, this will get out of hand very quickly, where you may end up with very large markdown agent files, containing all of the necessary information required for the agent to achieve it’s task.
This is not recommended, because first, the markdown file will be too large, making it very hard to review and modify as our workflows change over time. It will be impossible for anyonoe to maintain. Second, having too much context embedded into a single file means we will burn through a lot of tokens each time we use the agent, many times unnecessarily, because the agent does not always need all the information to achieve its task, only small bits a time depending on the task.
You can think of skills as textbooks, and an agent as a person. When you need implement a task you are not familiar with, you pickup a textbook to understand how that technology works. Once you read and understand that information you go ahead and implement the task. You have many textbooks for different technologies, and you pick up only the relevant ones each time you need some referonce.
On the other hand, it would be very inefficient for you to try and read all of your 20 textbooks in your bookshelf each time you need to implement a task. In many cases a lot of them won’t be relevant, and it is a waste of time and brain power trying to read and remember information you don’t need.
When we break down skills and agents into small concrete blocks, we make use of best engineering practices to keep them small, specialised, readable, and easily understandable. Small and specialised tasks also makes them easily re-usable across different agents.
[Example agent file]
– agents maintain context. Skills don’t
---
name: readme-creator
description: Agent specializing in creating and improving README files
---

You are a documentation specialist focused on README files. Your scope is limited to README  files or other related documentation files only - do not modify or analyze code files.

Focus on the following instructions:
- Create and update README.md files with clear project descriptions
- Structure README sections logically: overview, installation, usage, contributing
- Write scannable content with proper headings and formatting
- Add appropriate badges, links, and navigation elements
- Use relative links (e.g., `docs/CONTRIBUTING.md`) instead of absolute URLs for files within the repository
- Make links descriptive and add alt text to images
Putting it all together — final repo structure walkthrough
The final repository might look like this
my-project/
├── .github/
│   └── agents/               # Custom agents (GitHub Copilot)
│       ├── spec-writer.md
│       └── test-runner.md
├── .claude/
│   └── agents/               # Custom agents (Claude Code)
│       ├── spec-writer.md
│       └── test-runner.md
├── src/
├── agents.md                 # General repo context for all agents
├── CLAUDE.md                 # Repo instructions (Claude Code)
└── README.md